3D Printed Prosphora Seals/Stamps
Introduction:
I've been gaining deeper interest in Orthodox Christianity the past few months and part of that has lead me to learn about the Mystery of the Eucharist and the tradition of the consecrated bread, called "Prosphora". On 9/16/20 I ended up modeling (in Blender 3D) and printing a prosphora seal, From the Wikipedia on Prosphora:
On December 8th I modeled and printed the larger Byzantine style. Linked below is the STL and SVG of the seal that I traced using Inkscape and modeled in Blender.
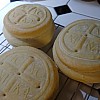
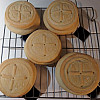
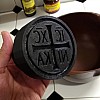
Pictures of the small seal:
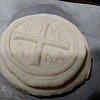
and of the small stamp:
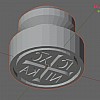
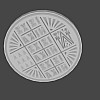
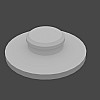
Renders of large Byzantine style stamp:
STL Downloads:
You can download and print the model using the STL:
Other Downloads:
- The SVG graphic for the small seal is public domain, by Tom Lemmens
- SVG Download for the large Byzantine seal
Print settings:
If using the slic3r software, leave the "Only infill where needed" un-checked, to make sure you get infill everywhere in the geometry. I used 5% honeycomb infill with basic PLA/PETG filament in an Anycubic Kossel Plus delta printer.
Recipe:
I based this off this recipe by Phyllis Meshel Onest, M.Div.
Ingredients:
- 2.5 cups flour (I used "all purpose", but bread flour is suggested in many recipes)
- 1 cup water
- 1 tsp active dry yeast
- ~1/2 tsp salt
Process:
- Warmed the water for 30 seconds in the microwave and dissolved the yeast, mixed the flour and salt together.
- Make a well in the flour and add the yeast water and mix with a hefty wooden spoon adding flour until it comes together into a ball
- Knead the dough ball while praying the Jesus Prayer until it's of a good bread consistency
- Let rise for 30 minutes
- Flatten out into disc about 3/4" thick for the bottom halves, cut out ~3" rounds using a cup or biscuit cutter (might design cutters soon)
- Flatten a bit more, to about 1/2" thick for the tops, and don't worry about taking scraps and re-kneading and rolling it out, it's supposed to be a dense bread. Cut out rounds about 2.5" in diameter
- Press the seal into the top halves evenly and firmly, flouring the seal and tapping it to get the excess off between each one
- Brush on some water to the lower round and place the top round in the center
- Using a skewer or toothpick puncture the loaves (I went all the way through) to prevent air from getting trapped and having them break while baking, I did 5 on the outside of the cross and one in the middle
- Let stand for an hour before baking
- I used parchment paper on an 'air bake' cookie sheet and set the oven to 350 degrees F and baked for 30 minutes
NOTE: The linked recipe uses 3.5 cups flour, which was too much and ended up kneading water into the tough dough a few times to get a proper consistency (not easy), it's much easier to add flour to a sticky dough!
